

Part 1: Why Injection Molding Dominates Outdoor Manufacturing
Outdoor products face a brutal combination of stresses: ultraviolet radiation, freezing nights, boiling dashboard temperatures, salt spray, mud, sand, and repetitive impact. Few materials can handle all of these. Injection molding succeeds because it offers:
Material precision – You can put a stiff, glass‑filled nylon exactly where strength is needed and a soft, grippy TPE exactly where touch is needed, all in one part.
Geometric freedom – Undercuts, living hinges, snap‑fits, logos, and textured grip patterns can be molded in a single shot, eliminating assembly steps.
Scalable economics – After an expensive steel mold is built (typically $10,000–$100,000), each additional part costs only a few cents in material and cycle time.
Lightweighting – A well‑ribbed plastic part can match the stiffness of aluminum at half the weight.

Part 2: Critical Material Families for Outdoor Applications
Not all plastics belong outside. Here are the five most common resin families used in durable outdoor goods, with their real‑world trade‑offs.
2.1 Polypropylene (PP) – The Workhorse
Advantages: Excellent chemical resistance (fuel, solvents, acids), very low density (0.90 g/cc), superb fatigue resistance – the only common plastic that can make true “living hinges” that bend millions of times.
Weaknesses: Poor UV resistance without heavy stabilization; becomes brittle below –10°C if not modified.
Typical uses: Cooler bodies and liners, folding chair joints, water bottle caps, kayak hatch rims.
Additive tip: Always specify UV‑stabilized PP (usually with carbon black or hindered amine light stabilizers) for outdoor exposure.

2.2 Nylon (PA6, PA66, PA12, and glass‑filled grades)
Advantages: High tensile strength, outstanding abrasion resistance, good chemical resistance to oils and fuels. Glass‑filled nylon (30–50% glass fiber) becomes incredibly stiff and strong.
Weaknesses: Absorbs moisture from the air (up to 8% by weight), which changes dimensions and reduces strength/toughness. Must be dried before molding.
Typical uses: Climbing cam slings, snowshoe decking, power tool housings, chainsaw bodies, rifle stocks.
Design note: Use PA12 for parts that need lower moisture absorption and better low‑temperature impact.

2.3 ABS (Acrylonitrile Butadiene Styrene)
Advantages: Tough, good impact resistance, excellent surface finish for painting or plating, easy to mold.
Weaknesses: Poor UV resistance – degrades rapidly in sunlight unless coated or blended with ASA.
Typical uses: Hard hat shells, portable speaker enclosures, kayak hatches, camping lantern housings.
Upgrade path: ABS/ASA blends retain the toughness of ABS but add UV stability.

2.4 Polycarbonate (PC)
Advantages: Exceptional impact strength (nearly unbreakable), transparent grades available, wide service temperature (–40°C to 120°C).
Weaknesses: Expensive, prone to stress cracking when in contact with certain chemicals (solvents, grease), scratches easily without hard coating.
Typical uses: Safety goggles, visors, clear compass housings, chainsaw handguards, drone frames.

2.5 Thermoplastic Elastomers (TPE, TPU)
Advantages: Rubber‑like flexibility and grip, can be overmolded directly onto rigid plastics, excellent abrasion resistance.
Weaknesses: Lower heat resistance (usually <100°C), surface can attract dust, higher cost per pound.
Typical uses: Grip covers for trekking poles and bike handles, watch bands, waterproof boot zipper seals, camera housing bumpers.

Part 3: Design Rules for Outdoor‑Worthy Injection Molded Parts
A perfect material choice will still fail if the part is poorly designed. These five rules are non‑negotiable for outdoor components.
3.1 Uniform Wall Thickness
Thickness changes cause sink marks (visible depressions) and internal stresses (which lead to cracking). Target 2–4 mm for most outdoor parts. If a thick section is unavoidable, core it out from the back.
3.2 Ribs Instead of Bulk
To make a part stiffer, add ribs that are 50–70% of the nominal wall thickness. Ribs should be no taller than 3× their base width. This saves material, reduces cycle time, and prevents sink.
3.3 Draft Angles
Every vertical wall needs a draft (taper) of 1–2° per side – more for textured surfaces (3–5°). Without draft, the part will scratch or stick in the mold during ejection.
3.4 Living Hinges (Polypropylene Only)
A true living hinge is a thin, flexible section (0.25–0.5 mm thick) that is oriented during molding by the flow of polymer molecules. The hinge must be straight, with generous radii at its ends to prevent tearing. Do not attempt living hinges with nylon or ABS – they will fail in days.
3.5 UV and Weather Protection
Add UV stabilizers to the resin (carbon black is the cheapest and most effective).
Avoid sharp notches – they concentrate stress and accelerate UV cracking.
Use rounded corners (minimum radius 0.5 mm) everywhere.

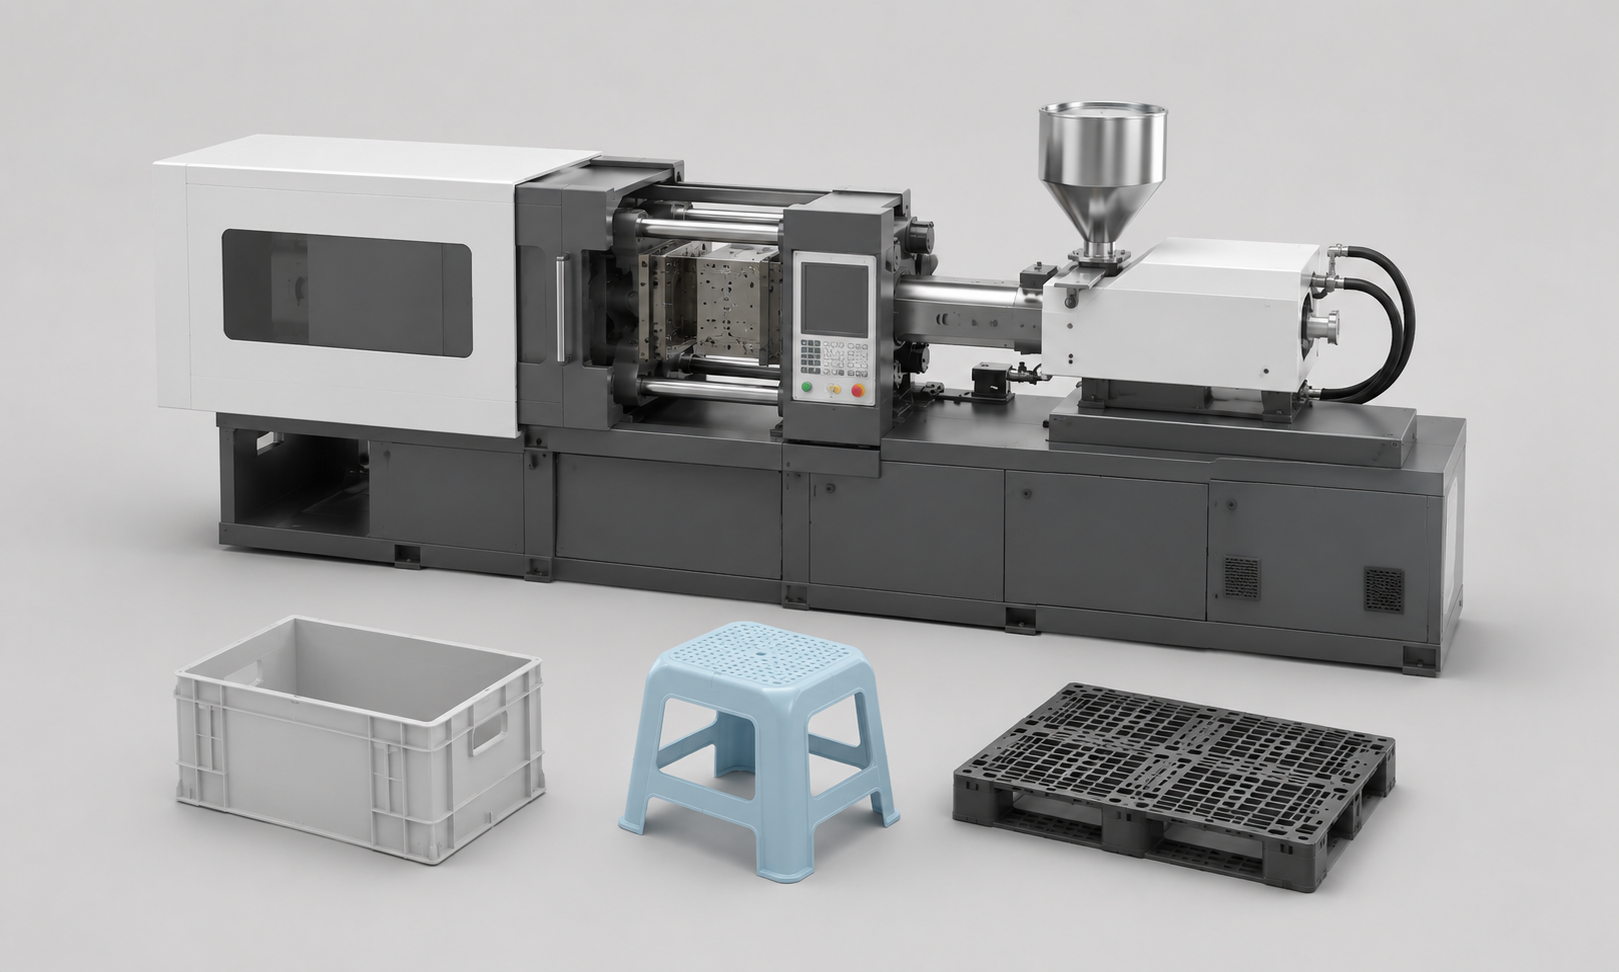
Part 4: The Injection Molding Process for Outdoor Parts
While the basic injection molding cycle is the same for all industries, outdoor parts have specific requirements.
Step 1 – Drying
Many outdoor materials (nylon, PC, PET) are hygroscopic. Moisture turns to steam inside the hot barrel, causing splay marks (silver streaks) and reducing strength. Typical drying: 80–120°C for 2–4 hours.
Step 2 – Melting and Injection
The screw rotates, shearing the polymer into a molten state (200–300°C). The screw then moves forward, injecting the melt into the closed mold at pressures of 500–1500 bar (7,000–22,000 psi). Fill time: 0.5–3 seconds.
Step 3 – Packing and Holding
After the cavity is filled, additional material is “packed” in to compensate for shrinkage (which can be 0.5–2% for semi‑crystalline plastics like nylon and PP). This packing phase prevents sink marks.
Step 4 – Cooling
Cooling takes 60–80% of the total cycle time. Outdoor parts often have thick sections or ribs that require longer cooling. Poor cooling leads to warpage and internal stress.
Step 5 – Ejection
Ejector pins push the part out. For complex or sticky parts, mold releases or robot arms are used. Some outdoor parts (e.g., large cooler lids) are ejected onto a conveyor belt.

Part 5: Real‑World Case Studies
Case 1: Waterproof Box Gasket (IP67 Rated)
Material: Silicone TPE (or liquid silicone rubber – a specialized injection process)
Design challenge: Consistent compression without flash over thousands of cycles
Solution: A fully‑round cross‑section (2 mm diameter) with a 0.2‑mm interference fit. The gasket is overmolded directly into the groove, eliminating assembly.
Case 2: Ski Binding Heel Piece
Material: 35% glass‑filled nylon 66
Design challenge: Withstand –30°C impact (ski boot striking the binding) while releasing cleanly under extreme forward lean
Solution: Ribbed pocket geometry with a stainless steel overmolded insert at the wear point. The ribs distribute impact load; the steel insert handles sliding friction.
Case 3: Camping Stove Control Valve Knob
Material: ABS core + TPE overmold
Design challenge: Ergonomic shape that resists grease, heat, and UV from campfire proximity
Solution: A two‑shot molding process: first ABS (stiff, heat‑resistant), then TPE (soft, grippy, chemical‑resistant) over the outer rim.
Case 4: Cooler Hinge
Material: UV‑stabilized polypropylene
Design challenge: 90° opening with no metal springs or pins (corrosion risk)
Solution: A molded‑in living hinge on each side of the lid, combined with an integrated detent feature that holds the lid open at 60°, 75°, and 90°.
Part 6: Defects Specific to Outdoor Molding (And How to Fix Them)
Outdoor parts are held to higher aesthetic and functional standards. Common defects include:
| Defect | Cause | Outdoor‑Specific Fix |
|---|---|---|
| Splay marks | Moisture in resin | Dry nylon/PC for 4+ hours |
| Brittle failure at –20°C | Wrong material grade | Switch to impact‑modified PP or PA12 |
| Yellowing/cracking after 6 months | No UV stabilizers | Add carbon black or HALS |
| Warped cooler lid | Uneven cooling | Add cooling channels near thick ribs |
| Weld line visible on grip | Melt fronts meeting cold | Increase mold temperature, relocate gate |
Part 7: Sustainability and the Future
The outdoor industry is under pressure to reduce plastic waste. Injection molding is evolving in three key directions.
7.1 Recycled Feedstocks
Post‑industrial recycled (PIR) – Scrap from molding plants is reground and reused. Already common.
Post‑consumer recycled (PCR) – Nylon from discarded fishing nets, polypropylene from used coolers. Challenge: maintaining consistent melt flow and color.
Chemical recycling – Depolymerizing nylon back to caprolactam monomer, then re‑polymerizing. Produces virgin‑quality resin.
7.2 Biopolymers
PLA (polylactic acid) – Compostable but too brittle for most outdoor use. Blends with PBAT improve toughness.
Starch‑based compounds – Low durability; suitable only for non‑structural items like plant stakes.
7.3 Design for Disassembly
Mold‑in labels instead of adhesive stickers (adhesive contaminates recycling streams).
Snap‑fits instead of ultrasonic welding – so parts can be separated at end of life.
Mono‑material designs – A cooler made entirely of polypropylene, including the hinge and latch, no metal or other plastics.
7.4 On‑Demand and Local Molding
Portable injection molding machines (desktop size) are beginning to appear in repair shops and outdoor retailers. They can produce small batches of replacement clips, buckles, and knobs from recycled filament, reducing the need to ship parts across continents.


Conclusion: The Invisible Backbone of Adventure
Injection molded parts rarely appear in marketing photos. No one buys a backpack because of its buckles or a tent because of its pole connectors. Yet these small, precisely engineered components determine whether gear fails on day one or lasts for a decade of hard use.
By combining the right material (UV‑stabilized PP, glass‑filled nylon, or impact‑modified ABS) with intelligent design (uniform walls, ribs, draft, and rounded corners), manufacturers produce parts that survive snow, salt, sun, and stupidity. And with the rise of recycled polymers and mono‑material designs, injection molding is becoming a tool for circularity, not waste.
Next time you strap on a helmet, close a cooler, or click a trekking pole into place, take a moment to look at the small plastic pieces holding everything together. They were born in a steel mold, under high pressure and heat – and they are the reason you can focus on the mountain, not on repairing your gear.
Related product and article resources
For procurement comparison and technical evaluation, readers can continue with these related product pages and supporting articles.